Professional Installation Guide
Complete step-by-step installation instructions for powder coated cabinet systems with detailed illustrations and safety guidance.
Recommended: Professional Installation
While these instructions provide comprehensive DIY guidance, we strongly recommend professional installation to ensure optimal results, safety, and warranty protection.
Work with Our Design Experts
Our experienced design team can coordinate with your contractor or work directly with you to ensure perfect planning, spacing, and execution.
Distributor Network
Connect with one of our authorized distributors who have local installation partnerships and deep product expertise.
Installation Overview
Is This Project Right for You?
Installing garage cabinets is an intermediate-level DIY project. You should be comfortable with:
- Using power tools (drill, saw, level)
- Finding and marking wall studs
- Lifting heavy objects (cabinets can weigh 50-100+ lbs)
- Following detailed measurements
⏱️ Time Required: Plan for 1-2 full days for a typical garage installation
👥 You'll Need a Helper: Many steps require two people for safety
Understanding the Hanging Rail System
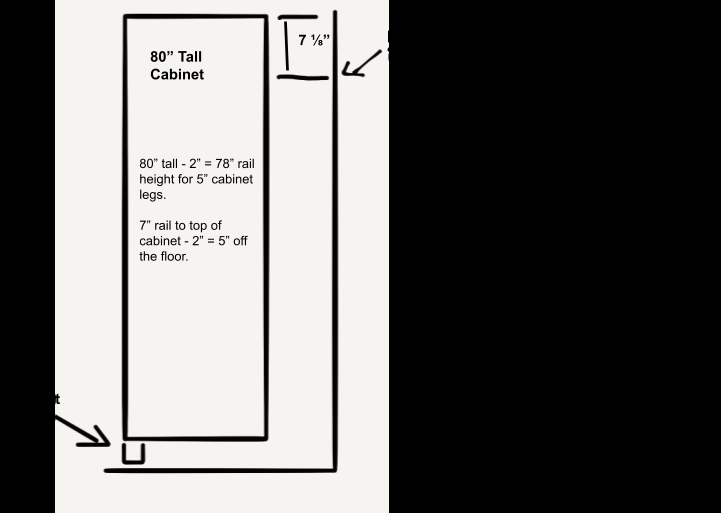
Your cabinets use a French cleat-style hanging system:
- • Metal rail attaches to wall at stud locations
- • Cabinet rail hooks onto wall rail securely
- • Rail holes are exactly 7⅛" below cabinet top
- • System distributes weight evenly
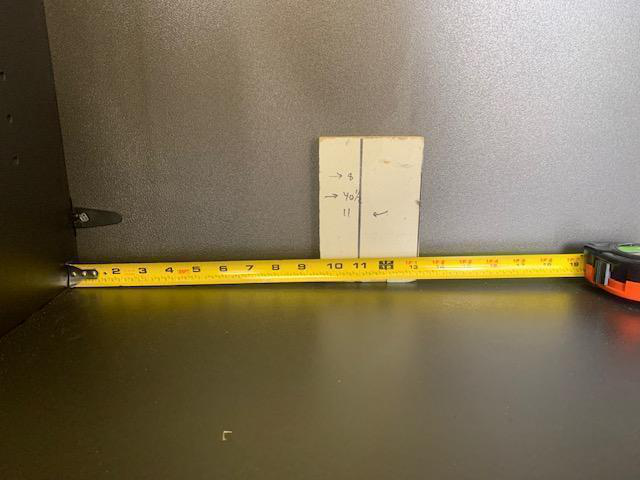
Key Formula: Rail Height = Cabinet Height - 2"
Example: 80" cabinet = 78" rail height
⚠️ When to Call a Professional
Contact a licensed electrician or plumber if:
- • You need to move electrical outlets or switches
- • You discover unexpected wiring or plumbing
- • You're uncomfortable working near electrical panels
- • You need to install into concrete walls
💡 Remember: We're happy to work with you and your contractor to ensure perfect results. Our design experts can provide guidance throughout the process.
Planning and Preparation
Setting Up Your Workspace
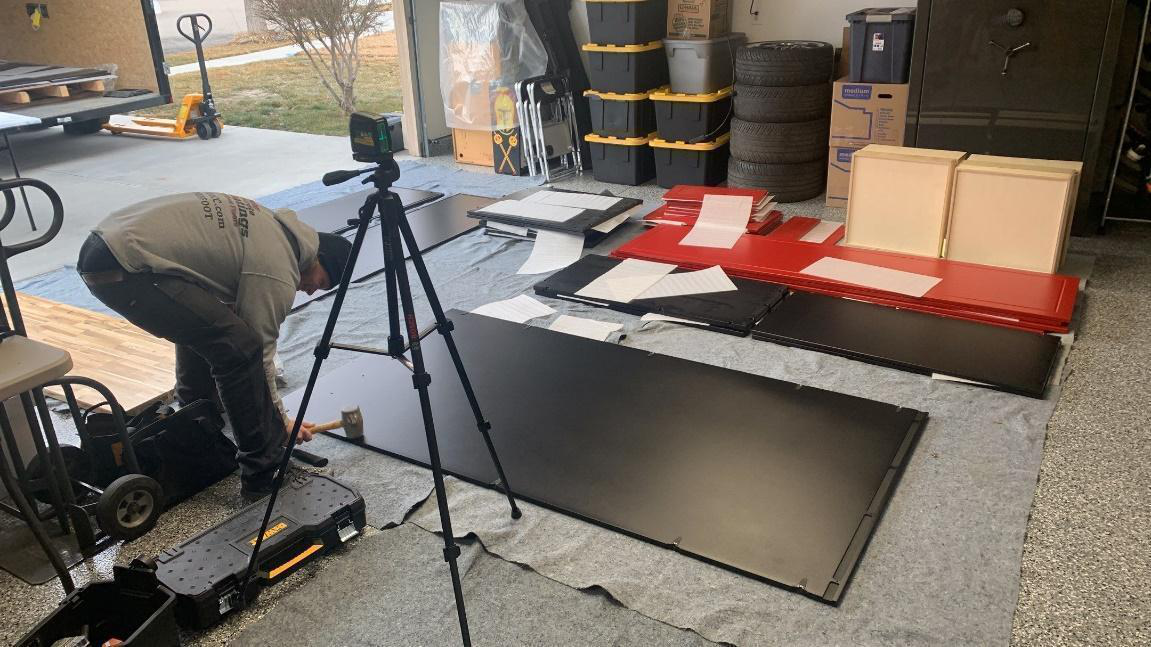
Workspace Preparation
- 1. Clear garage of vehicles and items
- 2. Create at least 10 feet of working space
- 3. Lay moving blankets flat (avoid bunching)
- 4. Sort cabinet pieces by unit number
- 5. Set up tool station near work area
🚨 Critical Safety: Mapping Your Walls
Before drilling any holes, you must map potential hazards behind your walls.
Electrical Panels
- • Find main panel and sub-panels
- • Identify garage breakers
- • Plan to turn OFF during install
Electrical Pathways
- • Outlets connect horizontally
- • Wires run vertically from outlets
- • Mark paths with painter's tape
"Hot Zone" (High Risk)
- • 2-4 feet from floor
- • Where electricians commonly drill
- • Use extra caution here
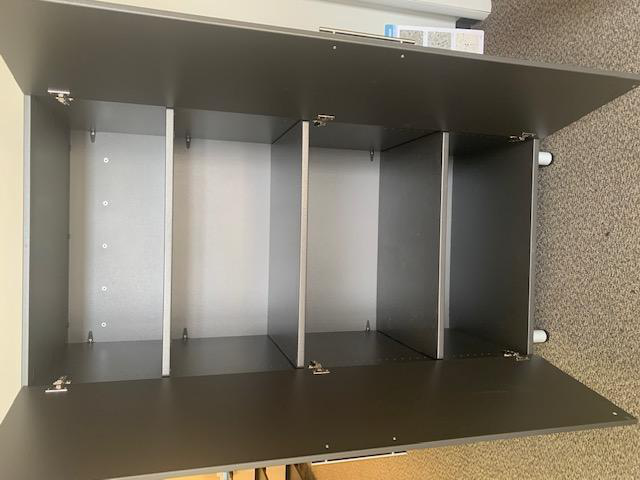
Cabinet Assembly
Installing Assembly Hardware
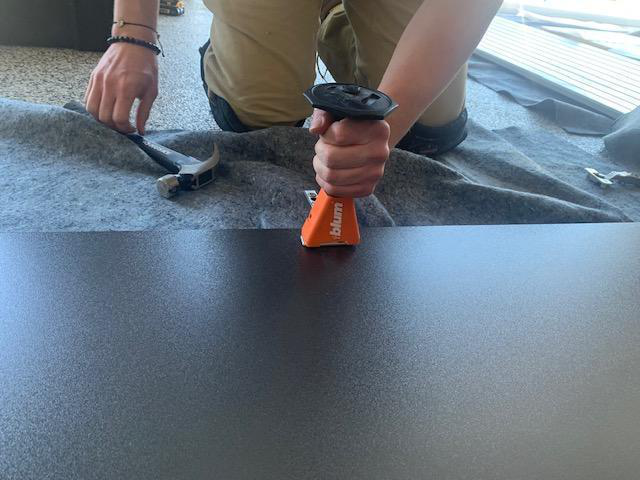
Cam Lock Installation
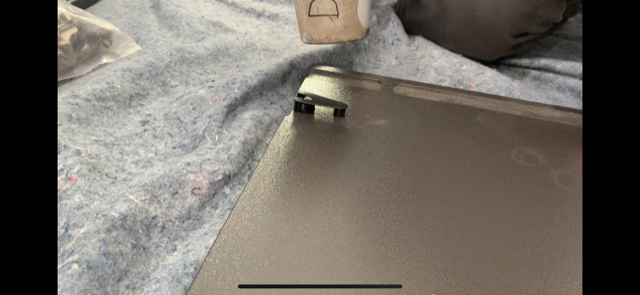
Critical Technique:
- 1. In cold weather, warm cams in your hands
- 2. Place cam in pre-drilled pocket
- 3. Tilt hammer slightly - small side leading
- 4. Tap gently until flush
💡 Pro Tip: The angled approach prevents cracking
Hinge Mount Installation
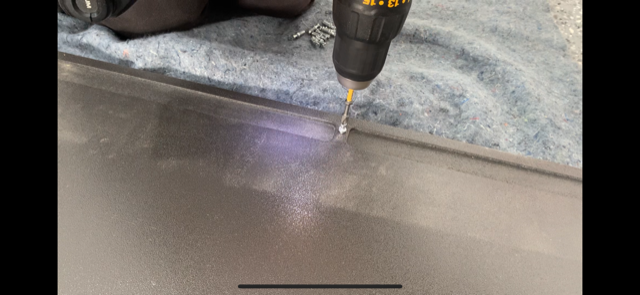
- • Set drill clutch between 3-5
- • Use #2 Phillips bit
- • Stop when clutch engages (prevents over-tightening)
Assembling the Cabinet Box
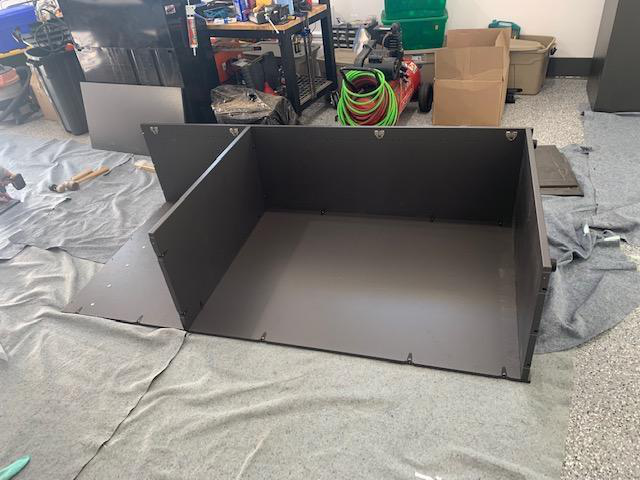
Assembly Sequence (Critical Order)
- 1. Prepare the base:
- • Lay back panel on blankets
- • Place furring strips under edges
- • Allows panels to nest in grooves
- 2. Build in order:
- • Bottom first
- • Fixed shelves/dividers
- • Both sides
- • Finally the top
- 3. Lock the cams:
- • Slide over metal dowel
- • Turn 180° clockwise
- • Feel it grab and tighten
- 4. Critical step:
- • Attach furring strip 6" from bottom
- • Use double-sided tape
- • Prevents bowing when anchored
Wall Rail and Cabinet Installation
Installing Wall Rails
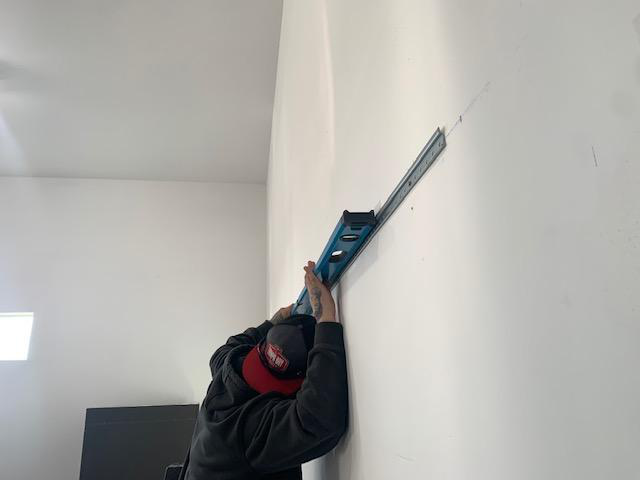
Installation Process
- 1. Position the rail:
- • Align with marked height line
- • Center screw holes on line
- • Have helper check with level
- 2. Check wall flatness:
- • Look for gaps (indicates bow)
- • Mark areas needing shims
- 3. Secure to studs:
- • Use 1¾" structural screws
- • Don't fully tighten until shimmed
🔧 Safety Note: 1¾" screw length provides solid hold while avoiding electrical wires
Outlet Cutting (When Necessary)
If an outlet falls behind a cabinet:
- Method 1 - Laser:
- • Point laser at outlet center
- • Hang cabinet temporarily
- • Mark inside cabinet
- Method 2 - Measuring:
- • Install adjacent cabinet first
- • Measure from rail and cabinet edge
- • Transfer measurements
- Cut 1" larger than outlet cover
⚠️ Never move electrical outlets - requires licensed electrician
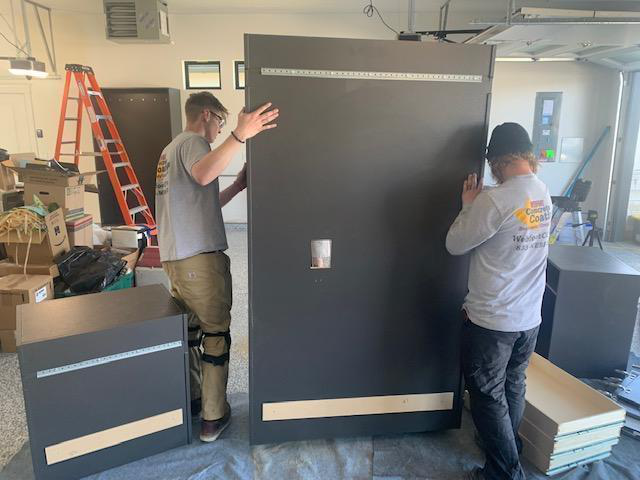
Hanging Cabinets
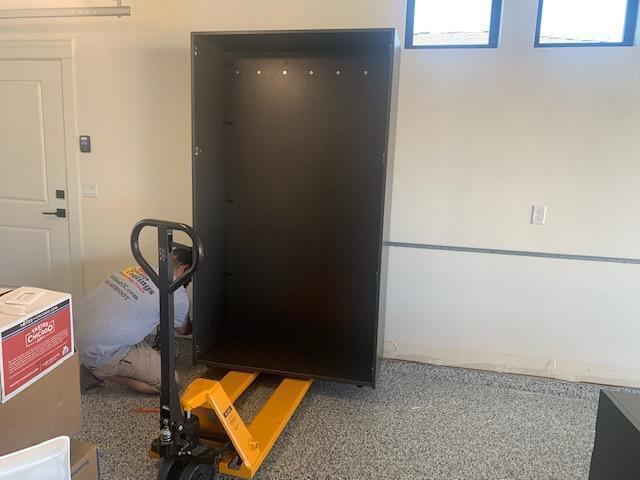
👥 Two-Person Operation Required for Safety
- 1. Position for lifting:
- • Use pallet jack or grip firmly
- • Keep path to wall clear
- 2. Mount on rail:
- • Lift above rail height
- • Tilt top toward wall
- • Lower until rails engage
- • You'll feel it "drop in" securely
- 3. Test the mount:
- • Should slide left-right
- • Should NOT lift off
Installing Legs and Anchoring
Adjustable Legs
- 1. Measure needed length
- 2. Cut ½" shorter than floor mark
- 3. Slide onto brackets at angle
- 4. Adjust for level
Bottom Anchoring
- 1. Use 6" block as drilling template
- 2. Pre-drill pilot hole
- 3. Secure with 3" lag screw
- 4. Tighten until snug (don't overtighten)
Doors, Drawers, and Fine-Tuning
Installing Shelves and Hinges
Shelf Installation
- • Plan positions for your storage needs
- • Don't align with hinge positions
- • All four corners must be level
- • Finished edge faces forward
Soft-Close Hinges
- 1. Lay doors face-down on blankets
- 2. Place hinge in pre-drilled cup
- 3. Use knock-in tool and hammer
- 4. Tap alternating sides until seated
Hinge Adjustment Details
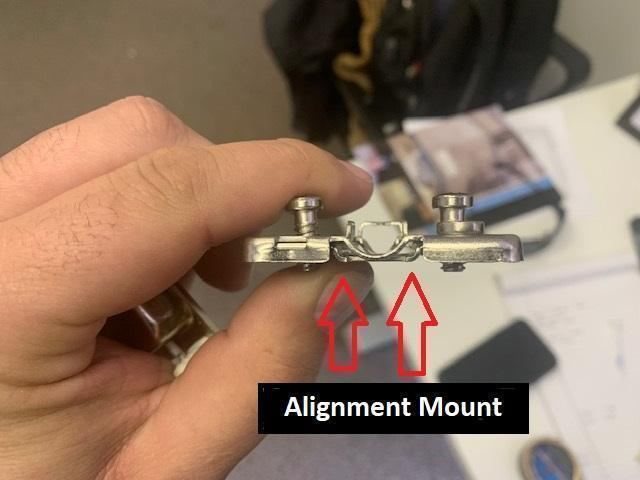
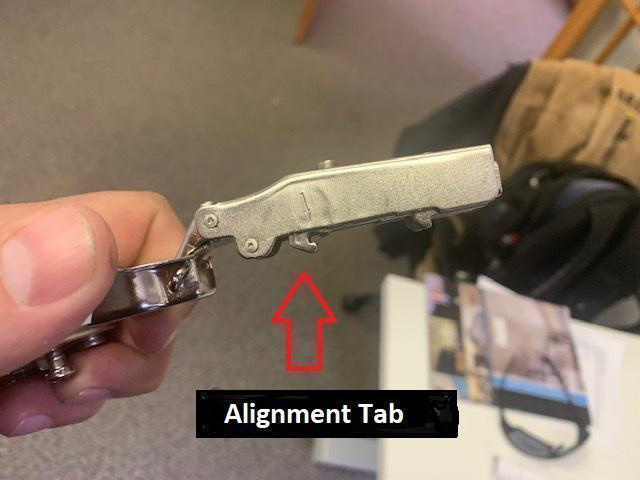
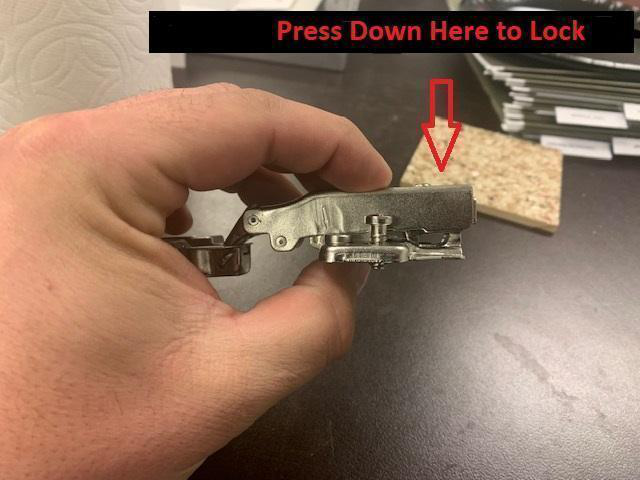
Hinge Anatomy
- • Alignment tabs slide into mount first
- • Press front of hinge to lock
- • Each hinge has three adjustments
Mounting Process
- 1. Start with top hinge
- 2. Align tabs with mounting plate
- 3. Press firmly until click
- 4. Install remaining hinges top to bottom
Drawer Installation
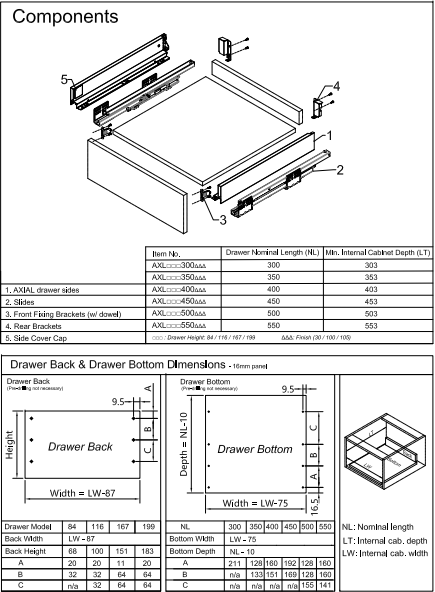
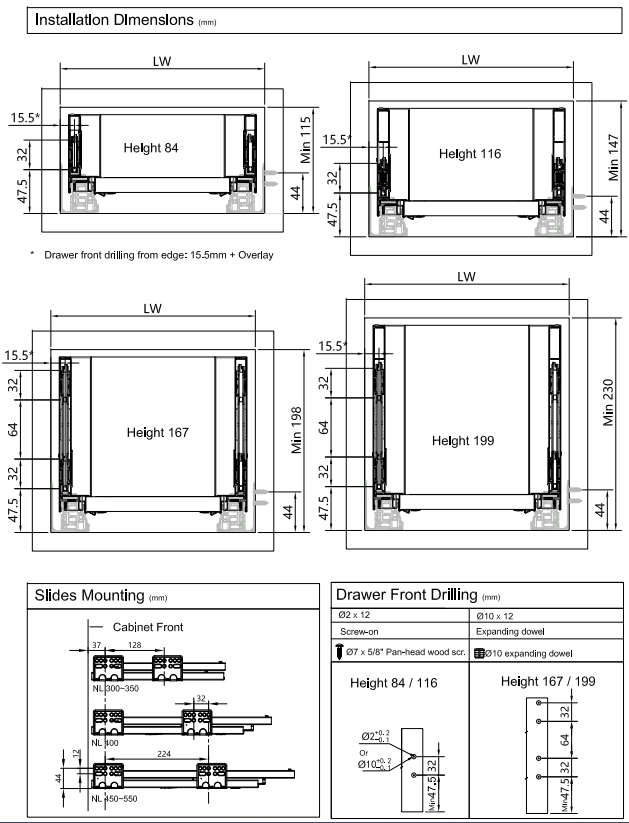
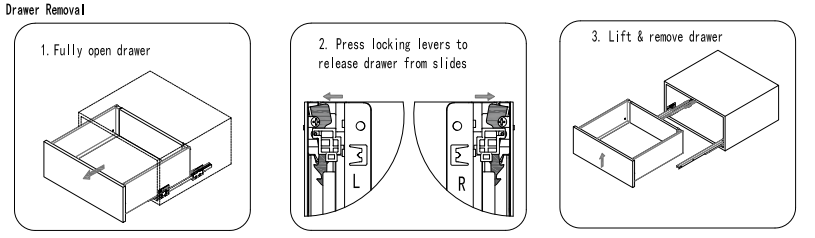
Assembly Sequence
- 1. Install slides in cabinet first
- 2. Assemble drawer box per diagram
- 3. Install rear brackets to sides
- 4. Mount drawer bottom
- 5. Attach front fixing brackets
- 6. Mount drawer front from inside
Professional Door Alignment
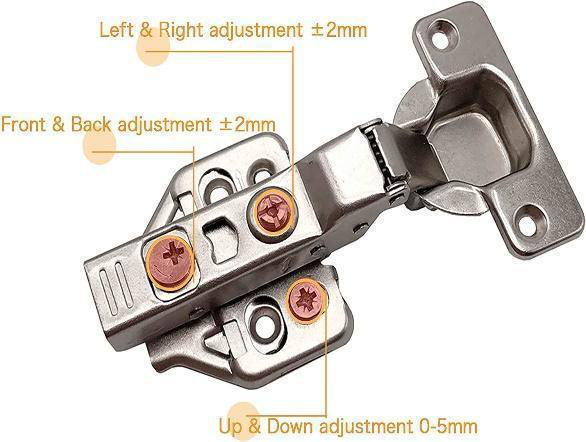
Three-Point Adjustment System
Adjustment Sequence:
- 1. Height first (up/down screw)
- 2. Gaps second (left/right screw)
- 3. Depth last (in/out screw)
- 4. Goal: Uniform 1/8" gaps
Final Hardware and Accessories
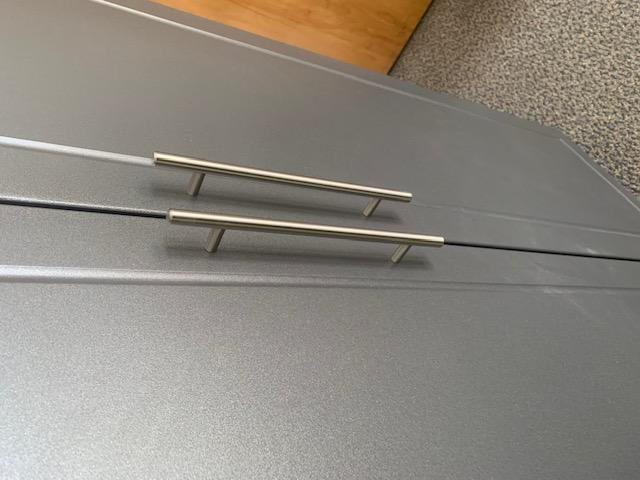
Handles and Bumpers
- • Use provided template for consistency
- • Pre-drill if required
- • Add bumpers at all door corners
- • Install on drawer boxes left and right
Slatwall (Optional)
- • Mark stud locations first
- • Install brackets at studs
- • Use hollow wall anchors for gaps
- • Attach trim with double-sided tape
Quick Reference
Key Measurements
- • Rail offset: 7⅛" from top
- • Standard clearance: 5-6"
- • Rail height = Cabinet height - 2"
- • Furring strip: 6" from bottom
Screw Specifications
- • Wall rail: #9/#10 x 1¾"
- • Bottom anchor: 3" lag screws
- • Safe depth: 1¼" into stud
- • Toggle anchors: 75+ lb rating
Safety Zones
- • Hot zone: 2-4 feet from floor
- • Wire protection: Beyond 1¼"
- • Always turn off power
- • When in doubt, call pro
Need Installation Support?
Our technical team and design experts are available to answer questions, coordinate with your contractor, or connect you with our authorized distributors for professional installation.
Design Expert Coordination
Work directly with our design team and your contractor for seamless installation planning.
Distributor Network
Connect with authorized distributors who have local installation partnerships.